You've got something ready to submit, now what?
🕑 4 min • 👤 Thomas Graf • 📆 April 22, 2019 in Tutorials • 🏷 backend, github
Alright, let’s assume you’ve followed the instructions in the previous two posts on pandoc and the metadata header. You have a beautiful article that’s ready to be posted on the Outdex. But how do you get it there? The simplest option is to email it as an attachment to submissions@outde.xyz. One of the maintainers (probably me) will handle the backend stuff and send you a link to a preview version. If you’re happy with the preview, your article goes live. Otherwise, you mail in a revised version.
This process should work fine for simple documents that don’t need a lot of revising. But for those of you who are familiar with Github, we have a much slicker alternative.
Since you’re still reading this, I assume that you are indeed familiar with the basics of Github. The rest of this post covers how you can use Github’s pull requests mechanism to create a submit-preview-revise loop on your own.
Step 1: Fork our Github repository
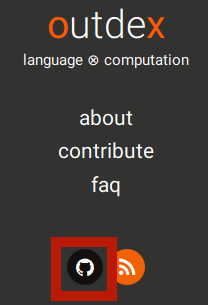
All the source files for the Outdex are hosted in our Github repository, which you can reach from anywhere on the Outdex by clicking the black-and-white Github logo to the left, next to the orange button for the RSS feed.
Thanks to Github, we can co-opt the usual software development workflow for article submissions. The first step in the setup is for you to go to our Github repository and fork it. After that, clone your fork as usual with git clone url_to_repo.
Step 2: Create your markdown file
Your article should be a markdown file with the file extension .md. The filename must start with a date, e.g. 2019-04-12_workshop-report.md. Without the date, your file might have the same name as an existing one, which complicates some of the later steps. Remember, the filename should follow the pattern
YYYY-MM-DD_some-name.mdYou will also have to decide what folder in your fork the file should go to. Depending on the post’s category, it should be saved in one of the following folders: - content/Discussions for open-ended posts that are meant to get a conversation going in the comments section - content/News for announcements, e.g. an interesting workshop, new journal, etc. - content/Tutorials for reader-friendly introductions to a technical topic or subject matter.
Step 3: Push and add a pull request
Once your done writing, sync your local changes to your fork:
git add .(add all changed files to next commit)git commit -m "some commit message (e.g. added new post on subregular workshop)"(commit all changes)git push origin master(sync all committed changes to fork)
Your new markdown file is now happily sitting in your fork of the Outdex repository. But it won’t do you much good in the fork, nobody can see it there. So as the last step, you have to create a draft pull request against the master branch of the Outdex repository. Make sure it is a draft pull request, not a normal pull request. That way, we can’t merge it in until you’ve given your final approval.
Here’s what happens at this point:
- Your pull request is automatically deployed by Netlify. Deployment takes a few minutes.
- Once deployment finishes, Netlify will create a preview version and append your pull request with a link to the preview. Click on this link to check the preview.
- If you’re happy with the preview, go to your pull request and click the button
Ready for review. Otherwise, start the revise-preview loop (step 3.1). - As soon as you mark your pull request as ready for review, the Outdex maintainers get an email notification. We will take a look at your pull request within the next few days and merge it in if everything seems fine. Otherwise we will add a message to the pull request. Make sure you have some way to regularly check your Github notifications (e.g. by having them emailed to you).
Step 3.1: Revise loop
If you want to make changes, just make them directly in your local copy and sync them to your fork. Your changes will be automatically pulled into the pull request, and Netlify will deploy the new version. Continue revising and checking the preview until you’re happy with the result. At that point, click the Ready for review button in your pull request so that we can merge in the final version.
Staying up to date
Hopefully your first submission won’t be your last one. But as time passes, your fork will become increasingly out of sync with the Outdex repository. This can create all kinds of issues with pull requests. To avoid those, you should always make sure that your fork is up-to-date before filing a pull request.
First, you have to add the Outdex repository as a new remote. You only have to do this once for your fork.
Once the remote has been added, you can pull changes from our repo into your fork with git pull upstream master. Then run git push origin master to sync all changes to your fork, and file a pull request.
I know, I know, it sounds tedious, but once you get the hang of it it reduces submission time to mere seconds. And remember that you don’t have to do this, email submission is fine, too. But regular contributors will quickly come to appreciate the git-based workflow.
Comments powered by Talkyard. Having trouble? Check the FAQ!